Showing posts with label Mooncakes. Show all posts

Monday, September 24, 2018

Dark Chocolate Mooncakes


It's Mid-Autumn Festival today, all the mooncakes baking and making finally comes to an end. This year I think I baked the most of all the rest of the years before. In fact I was still having 2 on my list that I wanted to bake, and they are the ones that I haven't try making before.
Well, of course, even after the festive celebration is over, I can still make them for normal afternoon tea treats , 😂

Anyway, today I'm going to share the recipe of this first timer I baked last week and it's definitely also a keeper and a must have for the coming Mid -Autumn festival celebration.


Here's the recipe link for you to download:


By the way, I used Hershey's Unsweetened Dark Cocoa Powder and it tastes great. The sweetness of the moon cakes overall was perfect as I used the less Sugar Emerald Lotus paste.


Besides this, I also baked up a batch of Traditional Piggy Mooncakes for the kids and also to be given as gifts to my friends. I baked these piggies every Mid Autumn as they were so cute and everybody loves it.


The recipe for these cute piggies are from Anncoo Journal and I'm linking back to her , so that you have a clear picture of how she mould and shape the piggies too. Have fun!


Here's wishing all of you a very warm and happy Mid-Autumn Festival celebration with your family and friends.


And happy baking!!

Saturday, September 22, 2018

Shanghai Cheesy Mooncakes.....My all time favourite

Mid-Autumn Festival is a week away , and everyone is busy and hustling to bake all the mooncakes they can bake.....and I'm one of them to, hahaha
Actually, I'm not quite a fan of mooncakes, even my kids and my Hubby too, they don't really care if there will be any mooncakes to cut on that festive day itself, as they never like mooncakes......not sure why, but for me, it's too sweet I guessed.

Anyway, every year, I make sure that I baked a batch of these yummy cheesy and melt in the mouth "Shanghai Mooncakes," and this recipe never fails me even on my first try. I fell in love with it the moment I took a bite, and ever since, it's been my 'must-have' for every Mooncake Festival. For this, my kids and Hubby , and even my in-laws loves it! 


So, without further talking, let's start baking some of these goodies. I will not submit a recipe this time on my version, as I think justice will be made if I link back to the person who shared this recipe to the world 7 years ago, and she is non-other than blogger Ms Sonia of Nasi Lemak Lover. Thanks dear for the yummilicious recipe, Sonia!!😘😘😘


Recipe link as below :
http://nasilemaklover.blogspot.com/2011/09/cheesy-shanghai-mooncake.html

I did everything exactly as the original recipe, and did not twerk or change anything, therefore I suggest you follow the original recipe like I do 😉


Besides, doing a batch without the egg yolks (for the kids), I also did a batch with egg yolks as my in-laws prefer to have the ones with yolks. Here they are, hope you also take some time to bake both of these version, as it's so good!!!

 Hope you like it too!

Recipe link as per below :
http://nasilemaklover.blogspot.com/2011/09/cheesy-shanghai-mooncake.html


Happy Baking !

Saturday, September 29, 2012

Happy Mooncake Festival 2012 to ALL


Wow, time really pass by so fast....it's Mooncake Festival again!! It seems like its just not too long ago I was  baking and molding mooncake, and now its here again, hehe.
Anyway, Mooncake Festival is a time where family members gather for a reunion dinner and then for a 'mooncake' feast under the bright moonlight with a pot of Chinese brewed tea, chit-chatting about the old times and laughing about it. As for the younger generations, they will lite up their lanterns and walk around the neighborhood on a group. That's how we celebrate it every year too, and to keep this tradition from dying off, I made sure I have homemade mooncakes, colorful lanterns and a pot of green tea or 'Teik Kwan Ying' ready for the sighting of the beautiful full moon with my family.

Therefore, this year I made a varieties, I really meant 'varieties' hehe for this celebration, since there were so many 'outrageous' designs and flavors postings in the blogging community, you just can't resist the temptations, but to make it too, LOL


Thanks to ANNCOO's Journal , I have some cute fat piggies for the kids to enjoy their mooncake this year with a little difference, hahaha, thanks Ann! *wink*


Then, of course I made the all time favourite, Snowskin Mooncakes of different fillings flavor from my previous last year recipe that I still find it to be the best one so far :)


However, the older generations still prefers the "traditional baked mooncakes" and of course, I wouldn't miss that. This time for the baked mooncakes, I tried Anncoo's recipe that is the one used on the piggies, and I liked it instantly, as the baked mooncakes turned out very nice, and the patterns are still very distinctive and clear after baking. you might want to give it a try  :)


And so, this year's Mooncake Festival will be of varieties and I'm glad I managed to post it in time before it ended, ahahaha, where I normally did.

Here's wishing all my fellow followers and bloggers, "Happy Mooncake Festival and have a happy and joyful family reunion".


Monday, September 12, 2011

HAPPY MID-AUTUMN FESTIVAL Y'ALL

Today is "Mid-Autumn Festival" or "Mooncake Festival"........so, here's me taking this opportunity to wish all of you .....


Here's some pictures of what my kids did on that night....it was not a perfect weather night for lantern strolling round our housing (the normal thing we used to do every year) as it was drizzling nonstop :(

So the kids was playing with their lanterns in the garage only........haha


Have a Happy Mooncake Festival !

Saturday, September 10, 2011

Mid-Autumn Festival - (3) Baked Mooncakes


As promised in my previous post, this is the batch of Baked Mooncakes that I baked using Alexandra's recipe too. I ever made baked mooncakes last year, but the skin turned out to be a bit hard and dry after baked. So, this year, I consulted a few friends and also search the net for a few more tips and method and recipes to try on. However, after seeing and tried alex's mooncakes, I really liked it and the textures are just like the store bought ones, hehe ;) 
Here's again, thanking Alex for the sharing and also for inviting me to her house for a hands on lesson on mooncake baking .

'Hello Kitty Mold' baked Mooncakes with Red Bean Paste filling........just for Angelica

Here is the recipe for the 'Baked Mooncakes' and if you are free, you can always hop into Alex's blog to check it out, she has lots of yummy recipes to share with you all too!


Baked Mooncakes
Ingredients
300gm Superfine / HK Flour 
250gm Sugar Syrup / Golden Syrup
50gm Cooking Oil  (I used Canola Cooking oil)
1/2 Tbsp Alkaline Water

Method 
  1. Mix sugar syrup , cooking oil and alkaline water together in a clean bowl with a wooden spoon or spatula.
  2. Mix in sifted flour, and fold in until all well combined and a dough is form. Cover and rest for 3-4 hours.
  3. Divide the skin dough and the paste filling according to the mold you use ( For eg: 160gm Mold will use a 40gm skin dough and 120gm paste filling) and shaped them into a ball. (Scale : 25% skin to 75% filling)
  4. Roll out the skin dough in between two sheets of plastic wrap / parchment paper and pick it up, rest it on your palm, and take a piece of the paste filling, place it in the centre, and wrap it up, sealing the seams.
  5. Dust the mold with some extra flour, knock them out, and place the mooncake into it. 
  6. Press on it using the palm of your hand to smooth and firm it up, and then knock it against the table top counter to release it. (Tips: Remember to put the side with the seam / opening facing upwards). Place it on a baking tray lined with parchment paper. Continue with the rest of the skin and filling dough until finish.
  7. Pre-heat oven to 170 degree Celsius (fan-based) and set the rack in the centre of the oven.
  8. Lightly spray the mooncakes with some water using a sprayer and sent to bake for 5 minutes. Take it out and let rest for 15 minutes.
  9. Lightly brush with eggwash (1 egg yolk + 1 Tbsp water) and bake again for 15 minutes or until golden brown.
  10. Take it out and let it cool completely before storing it in a container.  (Tips: Baked mooncakes are meant to be 'aged' for at least 1-2 days before consuming , as it will looks very much nicer in color and taste better.)


Happy Mooncake Baking!!

Wednesday, September 7, 2011

Mid-Autumn Festival (2) - Snowskin Mooncakes


As promised, I'm back with another post for Mid Autumn Festival preparation , and this post will be about 'Snowskin Mooncake" also known as "Ping Pi Mooncake" (in Mandarin that is, hehe). Lately, I found that a lot of people has developed the liking for this snowskin mooncake instead of the traditional baked ones, well, I don't really know the reason why, maybe because some says that the Baked mooncakes normally uses the 'lard' in the making, and that is not quite a healthy option :)

Then, snowskin mooncake uses no oil at all and it doesn't have to be baked too! Well, maybe that's the reason, but anyway, I personally likes Snowskin Mooncakes too. It's serve chill and not so sweet, and the snowskin effect kinda makes it a little lighter compared to the baked ones.......blah, blah, blah.....hehe, ignore me, LOL

I have enquired a few friends about this snowskin mooncake recipe as I'm a bit confused with the flour that it uses. Some mentioned about 'cooked Glutinous Rice Flour', whereas others mentioned 'Kao Fen'. However, I asked my MiL and she said that Kao Fen is actually Glutinous Rice Flour........but what I'm confused is how come when the recipe mentioned Kao Fen, it didn't asked to be 'cooked" ?? Does that meant Kao Fen is already a 'Cooked Glutinous Rice Flour' ?? I'm actually still not certain on this, but Alexandra told me that there is this shop here that sells 'Kao Fen' from Hong Kong, and to avoid those confusion, just use that and worry no more if it has to be cooked or not....*tongue*
I tested on the 1st recipe that a friend gave me and she suggested that I just bake/ fry the Glutinous Rice Flour in the oven/wok for about 10 minutes before using. Unfortunately, I did just that and the skin did not turned out the way a 'Ping Pi' should be :(
Well, maybe it was my miscalculation when mixing in the water to the flour+shortening that caused the error....*sigh*


Well, as determine as I am (you should know me by now), I'm not gonna just settle for that , so I decided to use Alexandra's recipe and bought myself a packet of that Hong Kong Kao Fen, and Alexandra willingly offered me to go to her house for a baking session, hehe  *wink* With her guidance and step by step instruction and tips, I managed to produce the perfect 'Ping Pi' mooncakes that I have always used to eat during Mid-Autumn Festival!!! Thank you so much Alexandra, muaks! She also offered me her 'Traditional Mooncake" recipe too , will post that in the next round ya ;)
For now, if you really want to make 'Ping Pi Mooncakes', it has never been easier, trust me!! I have never thought that I could made two types of mooncakes in one night (started at 6pm and finished at 12pm, burning midnight oil for this ....but hey, I got myself enough mooncakes to gift-away, isn't that worth all the effort?)


Here is the 'Simple & Fool-proof' Recipe courtesy of Alexandra (check out her blog too, she has yummy recipes you might like too).

SNOWSKIN 'PING PI' MOONCAKE RECIPE
Makes about 4 - 5 (160gm) mooncake

Ingredients 
100gm Kao Fen 
95gm Icing Sugar
30gm Shortening
130ml 'cold' water (might not need to use all) 
1 tsp flavoring paste
Food colouring 

Fillings : Your choice - Lotus Paste, Durian Paste, Red Bean Paste etc.


Method
  1. Sift Kao Fen and icing sugar into a bowl. 
  2. Rub shortening into the flour and sugar until mixture resembles 'crumbs'.
  3. Mix in the flavoring paste and food colouring into the cold water, stir to fully mixed.
  4. Slowly add cold water into the crumbs and mix it in to get a dough consistency that does not stick to your hands. Knead to form a dough that is pliable. 'Do not over knead'. (Note: you have to monitor the amount of water use, some flour will absorb more water, and some won't. Therefore it's either 130ml is too much or too little for you.....so add bit by bit)
  5. Let the dough rest for about 20-30 minutes. While waiting, scale the filling to each portion of 95gm, and roll it into a ball. 
  6. When the dough is rested, scale it into a portion of 65gm , and roll it flat on your palm, wrap a piece of the filling into the centre, and seal it in. (Note: Remember to dust the mooncake and the mold with extra 'Kao Fen' or 'Snow Powder' before putting the mooncake into the mold to press).
  7. Store the mooncakes in the fridge until ready to serve. 
Sounded really straight forward and easy right? So, what are you waiting for, you are still in time to make a batch for this Mid-Autumn Festival celebration .....;)


Pandan Snowskin with Green Tea Paste Filling

Happy Snowskin Mooncake Making!!


Monday, September 5, 2011

Mid Autumn Festival (1) - Dragonfruit Jelly Mooncake


It's the 8th month in the Chinese Lunar calendar and that means "Mid -Autumn Festival " is around the corner. I have always remember how it was celebrated every year, I always make it a point to bring the kids in the evening after dinner for a walk around the "Taman" we stayed, with each of them carrying their candle-lighted lantern. Then we will stopped at the nearby basketball court , where other neighbors joined in with their kids too. 

Later in the night, I will normally make a pot of  hot refreshing 'Jasmine Green Tea' and serve mooncakes, for the past few years all the mooncakes were either bought or given as gift by friends (except for the jelly Mooncakes, hehe), but this year is definitely going to be 'different' as I am serving 100% Homemade mooncakes....yeah!!! How does that sound? I just love it because it's not so much of the quality or what, but knowing that it was homemade, its just feels satisfying!!


So, to start of this Mid-Autumn festival celebration preparation, I made some Dragonfruit jelly Mooncakes to kick off, as this is the easiest and the kids just love to eat them since I have a few packets of agar-agar powder in the cupboard. Of course, the mission will be to learn to make some snowskin mooncakes and as you might still remember my last year traditional mooncakes (the bake ones) are not as nice and presentable too. So I'm going to try some new recipes and improve it :)

This is a very simple jelly mooncake, so for those of you who are interested to make some for the kids in the house or the neighborhood, do try it out. Hope you and your family will like it ......stay tuned for more Mid-Autumn Festival Mooncake preparation coming soon......cheers!

DRAGONFRUIT JELLY MOONCAKE RECIPE
(Makes about 8-9 mooncakes)

Ingredients for Filling
25gm caster sugar
1 1/2 tsp agar-agar powder
125ml water
70ml fresh milk
55ml evaporated milk
  1. Put sugar, agar-agar powder and water in a pot under medium heat. Stirring to dissolve the agar-agar powder and sugar and bring tit to a boil. Turn the heat off and add in the milk , stir to mix.
  2. Pour the solution into small molds (eg. small cups filling only about 1cm in height) and let it set.
  3. Remove it from the  mold and use a fork to scratch the surface (top and bottom). Set aside.
Ingredients for Skin
100gm caster sugar
4 tsp agar-agar powder
600ml water
150gm red dragonfruit (pureed)
4 pcs of pandan leaves (tied in a knot)
  1.  Boil water with sugar, agar-agar powder and tied pandan leaves in a pot. Dissolves the agar-agar powder and sugar and bring to a boil.
  2.  Turn the heat off and stir in the pureed Dragonfruit. 
  To Assemble
  1. Pour the some 'skin' agar-agar solution into the mooncake mold filling only about 1.5cm.
  2. When it is half set, put in the 'filling' and then fill up the mold with the balance of the 'skin' agar -agar solution to the rim of the mold. Let is set.
  3. Unmold and chill in the fridge before serving.

Have a nice day!


Thursday, September 23, 2010

Mooncake ....or not? (1)


It's the month of September, meaning the Chinese calendar is in the 8th month of the year still.......and Mid -Autumn Festival aka Mooncake Festival falls in this month. When I was a little girl, I just don't seem to understand why mooncakes can only be eaten during Mooncake Festival and not any other day?? hmm......funny huh! 
Anyway, I think nowadays, people can make mooncakes to eat anytime and any day they feel like eating....eventhough it's not Mid-Autumn Festival. Last year, when I just started to bake in August, I was still very new to baking, so was not confident enough to bake some mooncakes, instead make some 'jelly mooncakes' for the kids.....something more simpler that does not requires so much research and skills....LOL 

This year, I challenged myself to try baking some tradisional mooncakes as Ian requested that I made some homemake 'lotus paste' mooncakes for him. Wah! that was quite a request though, as if he knew his mother would be able to bake some for him with just a snap of my fingers....:P
I started researching and googling in the internet, look through some other bloggers experience and tips on making mooncake, and of course bought myself a "mooncake cookbook" too.
Guess what, I didn't know that lotus paste or any other oft he mooncake fillings can be that demanding during this season.......almost all the cake ingredients chops in KK ran out of stock on these fillings. I went to BWM just a week before the actual Mid-Autumn festival, and was told that they sold every single pack of fillings (whether it is lotus paste, red bean, green bean or green tea or durian paste) a week ago. OK.......gotcha!! Now what?? I was asking myself what else can I stuff into these mooncake that Ian will eat? hmm.......
Then, consider myself lucky, one of the cashier at BWM told me that a lady informed them that she has extra packets of lotus paste and durian paste that she is willing to sell out to those interested at the same price she bought from BWM :)  She gave me the telephone contact number and I called to enquire, managed to secure a pack of lotus paste, phew!!!


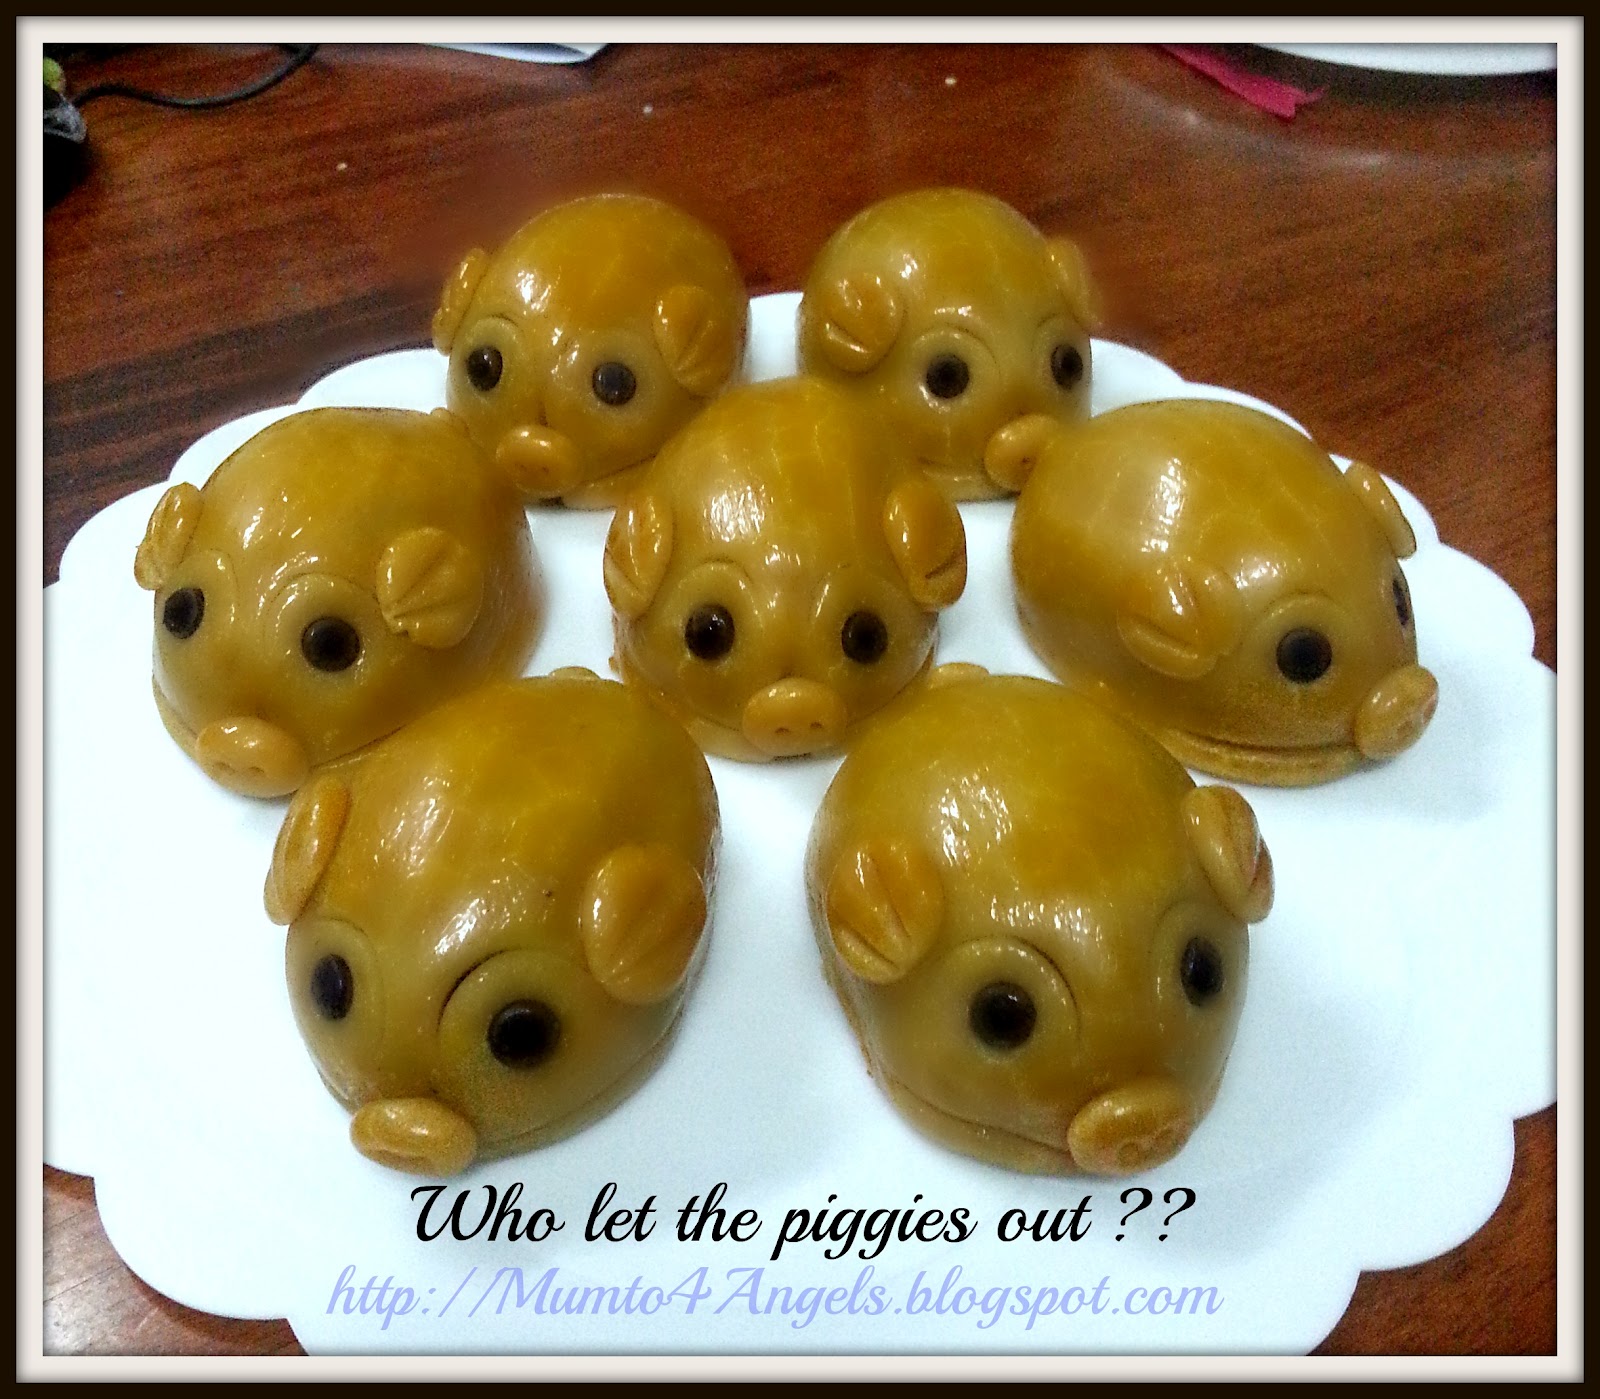
And so, this year, I made some 'Mini Lotus Paste Mooncakes' for my family to taste for Mid-Autumn Festival, though I must say, I'm not very satisfied with the result of the mooncakes, it does not look as nice and pretty as the ones sold in the supermarkets........but one thing....it's edible and the kids loved it!! LOL
I will add this mooncake into my list of "To Bake" as I attempted to try it again, guess i found my weakness and mistake along the way, so, I'm not posting the recipes up here as yet until I have perfected it myself first.
Till then .................


Happy Mid-Autumn festival to you all!!

Friday, October 2, 2009

Mid –Autumn Festival 2009

Yes, it's Happy Mid-Autumn Festival! It's the time of the year where the tradition of every Chinese family celebrates with their family and loved ones with a box of moon cake. I used to remember that when I was a kid, every Mid Autumn Festival, my mum would buy a box of moon cake especially for me, and the filling of the moon cake is "TAUSA" or so called Red bean paste. I only eat that flavour of moon cake during that time, and very reluctant to try others too. Stubborn, right? Hahaha.....

Nowadays, there are so many kinds of moon cake, and so many varieties of flavour too. To name a few, there have the 'Pin Pei Moon cake', 'Puff Pastry type of moon cake', 'Yam moon cake', 'Durian moon cake', 4 seasons moon cake meaning there are 4 types of taste in one single moon cake', and a lot more, I can't remember the names :P........because there are really a big varieties of them in the market. But, for me, I still prefer the traditional type, with the brown skin and not too fancy filling....just plain Red bean paste or Lotus paste with or without egg yolk.

As for my Hubby, he is really a "NO-NO" to sweet food, therefore he would shake his head when ask to take a bite of the moon cake.......LOL. For the kids, they don't really have a liking for moon cakes either, maybe a small piece if I tell them that it's a traditional celebration for Chinese family. Sigh, I think slowly, the modern Chinese will slowly fade of the very traditional type of moon cake as I can see that the sales for moon cake in the bakery shops are not so overwhelming, and even though people do buy, they prefer the cool type, which is the 'Ping Pei' skin and anything that is lighter, as people nowadays are very health conscious.

I still want to celebrate Mid Autumn Festival with my kids and family, but to get the kids to eat moon cake, I decided to make some 'Jelly Moon cake' that I selected from a book that I bought from the bookstore during one of my Sundays. I'm so excited to give it a try as its looks very beautiful and tasty too. I am sure the kids will love it too. So, I have selected a few that I wanted to try out, and decided I will give some to my nieces and nephew for Mid Autumn Festival celebration as a gift.....since most children loves jelly (a.k.a  agar-agar)....even I like agar-agar too........:P

So here are the few types of Jelly Moon cakes I made........try it...it's fun to make and nice to eat...:)

The recipes for these 4 types of jelly moon cakes will be as follows. Happy Mid Autumn Festival everyone....xoxo

Mid Autumn Festival Project #4


TIRAMISU ICE-CREAM Jelly Mooncake

Ingredients for mock jelly egg yolks

A:    1 tsp agar-agar powder

       40gm caster sugar

       1/8 tsp salt

       150ml water

       100gm carrot (diced, boiled till cooked, pureed)

For Filling

B:    1 heaped tbsp agar-agar powder

       20gm castor sugar

       125ml concentrated coconut milk

       150ml water

       50gm non-dairy fresh whipping cream

For the Skin

C:    20gm caster sugar

       1 tbsp agar-agar powder

       200ml water

D:   100gm Tiramisu Ice-cream

Method:
  1. Combine all ingredients (A) into a pot. Bring it to boil. Turn off heat, strain solution. Pour into small ice-cube moulds. Cool then keep chilled till it set. Unmould jelly egg yolks when needed.
  2. Bring sugar, agar-agar powder and water of ingredient (B) to a boil. Stir in whipping cream, turn off heat immediately. Strain solution and spoon a little into small moulds. Leave to set a little. Add in mock jelly egg yolks. Spoon in extra solution to cover mock egg yolk. Once set, unmould, trim edge, keep aside.
  3. Bring ingredient (C) to a boil. Turn off heat, add in ingredient (D. Stir evenly.

  4. Spoon a little no.(3) into moulds. Leave to set, add in no.(2), spoon in more of no. (3) to the surface. Leave to set, keep chilled.


Mid Autumn Festival Project #2


DRAGON-FRUIT Jelly Mooncake

Ingredients for mock jelly egg yolks

A:    1 tsp agar-agar powder

        50gm caster sugar

        200ml water

        50gm mango hot filling

For Filling

B:    1 ¼ tsp agar-agar powder

       50gm castor sugar

       125ml concentrated coconut milk

       150ml water

       1/8 tsp salt

       2 blade pandan leaves (knotted)

For the Skin

C:    100gm flesh of red dragon-fruit puree

D:    ½ tbsp agar-agar powder

        60gm caster sugar

        175ml concentrated coconut milk

        1/8 tsp salt

        50ml water

Method:
  1. Combine ingredient (A) to a boil, sieve mixture. Pour into rounded ice-cube moulds. Leave it to set before unmoulding.
  2. Cook ingredient (B) to a boil, sieve mixture. In small cups, pour solution, place in a piece of mock egg yolk. Set jelly, unmould, trim edges.
  3. In a pot, combine ingredient (D) together. Keep on stirring till it comes to a boil.
  4. Add in the dragon-fruit puree to no. (3). Once it comes to a rapid boil, turn off heat.

  5. Wet mooncake mould. Spoon a little no.(4) into it, set a little. Place in filling no.(2). Fill no.(4) to the brim of the mould. Leave to set, keep chilled. J