Wednesday, September 30, 2009

Thai Dried Shrimp Cookies

Oops, I can't remember which Saturday it was, but as usual my Saturdays and Sundays are always filled up with spending time with the kids, and now added baking into it. Still so new to baking, I was always thinking of making this, baking that and it's endless.......whenever I run my fingers through those cookbooks........I always have a plan draw out that I wanted to try everything that I saw in the cookbook,...crazy huh? What can I say.........:)

So, this Saturday I made an attempt to try to make the 'Thai Dried Shrimp Cookies" that I saw from one of the bloggers, Daily Delicious, therefore credits all goes to her. I like her blogs a lot as I have learned and gathered quite a number of awesome recipes from there and she is always very precise in showing the methods of doing things , which is very favourable to new beginners like me. Do give it a try if you like things made from shrimps....and the aroma is hmmm.........undescribable....hahaha. Here is the recipe, Happy Cookie Baking!


Thai Dried Shrimp Cookies
Ingredients
75g
Dried shrimp
1
Egg
75g
Sugar
165g
All purpose flour
115g
Unsalted butter
½ tsp
Vanilla extract

A dash of salt

Method
  1. Preheat oven to 180~C, and line the baking tray with baking paper.
  2. Combine the flour and dried shrimps in a bowl, put into a food processor and process until fine. Set aside.
  3. Beat the butter and sugar until blend and add a dash of salt. (You may omit the salt if you find that the shrimp is very salty, I did omit it).
  4. Put the egg into a bowl and beat until combine, then add in vanilla essence. Pour the flour mixture into the bowl, mix with a spatula until combine.
  5. Put the dough into the piping bag fir with 1 cm roll nozzle. Pipe the dough into 5cm small finger.
  6. Bake the cookies for 12-15 minutes (1 baked mine for about 20 minutes) or until golden brown. Let the cookies cool on the wire rack.


Saturday, September 26, 2009

COCOA BROWNIES

Brownies always reminds me of chocolate, rich and dark, chewy and nutty and every bite of it contains a mouthful of half-melted unsweetened chocolate chips. Woooo…….pretty sinful huh, LOL. Well, do indulge yourself in a bite of brownies once in awhile, it's really very enjoying and satisfying. I love brownies and my eldest son, Ian, just loves it ……………anything in chocolate is never a miss for him, just like me, hehe…..Hubby always says he has a taste for food ....just like me :P

Today, I flipped and flipped the cookbook and decided, "COCOA BROWNIES", yes, Cocoa Brownies I will make. Ian shouted "hooray" and cheered me into making it with extra chocolate chips and extra almonds in it. Now having a supporter like him beside me, how can I not make this brownie NOW!!! So, without another minute wasted, I digged out all the ingredients called for in the recipe and started the quest....hehe, the bake I mean..... Oh! By the way, I got this recipe from 'Daily Delicious' blog.


COCOA BROWNIE
Ingredients

115g / 4oz


butter
45g / 1½ ozcocoa powder (Dutch-Process Cocoa)
2eggs, beaten
225g / 8ozcaster sugar
1 teaspoonvanilla essence
55g / 2 ozself-raising flour
(or ¼ tsp baking powder with cake flour)
115 gany kinds of nut, chopped (I use almonds nibs)
55g/ 2oz


Method
chocolate chips

  1. Preheat the oven to 180°C. Grease and line the base of a 20cm/ 8 in square tin.
  2. Melt the butter over a low heat, then stir in the cocoa powder. Leave to cool.
  3. Beat the eggs with the caster sugar until pale, then fold in the cocoa mixture.
  4. Stir in the vanilla then sift the flour over the mixture and fold in.
  5. Spread half the mixture into the prepared tin and sprinkle with half the walnuts and chocolate chips. Cover with the remaining mixture then the rest of the walnuts and chocolate chips.
  6. Bake in the centre of the oven for 30 minutes or until set. A wooden cocktail stick inserted into the centre should come out damp but should not have any uncooked mixture clinging to it.
  7. Place the tin on a wire rack to cool before cutting into squares.
Trust me, you have to try this recipe, it's a must –try………Happy Brownie Baking!

Sunday, September 20, 2009

First Attempt in Bread Making

Sept 19, 2009 - Flipping the cookbook is what I do very often now, since I have adopted this habit and interest of baking and cooking. The very thing that really tempted me to try is "BREAD" making, a real loaf of sandwich bread or aka white bread.
I checked and checked my ingredients and bravo.....i have everything I need to make this "Pullman Bread" as stated in the book "The World of Bread with Alex Goh". I told Hubby that I will try to make a loaf of bread today .....and I did, hehe.
I weighed all my ingredients as stated and got all my utensils required. Geez, it's not as easy as I thought it was in the book, a lot of knead and proving time needed and it took me almost 5 hours to get that bread dough into the oven, to finally bake it for 20-25 minutes. Wow! i was very impressed with the outlook when i took the bread tin out of the oven......I opened the lid and the shape of a loaf is indeed promising........i knew I did it!


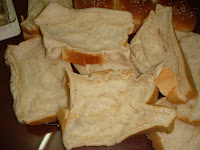
I can't wait to sliced the loaf into pieces and damn.......the bread was not properly bake or should I say.......it didn't turn out the way it should. Oh........no.........sigh........:(
I told Hubby and the kids my bread fail me.......*sob, sob*......and Hubby told me he will try it out with me the next day. Thanks Dear, that's very sweet of you and I was looking forward to it so much......bcos I knew Hubby has an experience in pastry and bead making before , when he used to work in Promenade Hotel before. OK, so tomorrow will be the second attempt.......but this time, I have Hubby with me........two is better than one....hehe, so to be continue tomorrow ;)


PULLMAN BREAD - 2nd ATTEMPT


Ok, so the first attempt in bread-making failed.......*sigh*. No worries, today Hubby said he will do it together with me, as he also wanted to refresh his bread-making skills that he mastered 8 -9 years ago, when he used to work in the hotel industry......hehe, so I have a 'sifu' here to guide me today.

I prepared all the required ingredients and so we start.

PULLMAN BREAD

330gm high protein flour

30gm caster sugar

½ tsp salt

1½ tsp instant yeast

190ml fresh milk (chilled)

25gm shortening

Method

  1. Combine flour, sugar, salt and yeast together in a mixer. Give it a mix before adding in chilled milk. Beat for 3-5 mins or till dough is formed. Adding in milk gives bread a better flavour and softer texture.


  2. Add in shortening, knead until the dough is smooth and elastic to the touch. Do a stretch test to check if the dough is fully developed by stretching a small piece of dough with your fingers. If the dough can be stretched thinly without tearing, then the dough has been kneaded well. If it tears, then you have to knead again until it passes the next stretch test.


  3. Leave the dough in a big bowl and covered with damp cloth. Leave it in warm place, let it rise till double its size for about 40 minutes. (I left mine for about 2 hours as we went out for breakfast with the kids, did a little household shopping at City Mall, hehe J)
  4. Shape dough into a big ball. Rest for 10 mins before dividing the dough into 3 smaller balls of equal size. Flatten each piece and roll up tightly like a Swiss roll. Tuck in the sides underneath to give it a neater look. Place it in a lightly greased 11cm x 11cm x 22cm loaf tin.
  5. Uncover, let it proof for the last time for about 45 mins or till it reaches more than half of the tin, then cover it. Bake in a preheated oven at 210~C for about 30-35 mins. Tap on the underside, the loaves should sound hollow. Remove it from the loaf tin and let it cool well on the wire rack. (Note: Always allow the bread to cool completely before slicing them)
YES!! My 2nd attempt in making a loaf of white bread has finally succeeded, thanks to Hubby's guidance.......muaks! For those of you who really thinking of making a loaf of white bread by yourself, but doubted that it is not possible.......let me tell you, you can do it.......just remember, don't rush, and practise makes perfect! It's not that hard to make a loaf of white bread by yourself.......all the effort is MUCH worth it!! Till then, Happy baking!!

Wednesday, September 16, 2009

Coffee Flower for the Coffee Lovers


Tea time is always the best way to enjoy a cup of freshly brewed coffee with some light snacks or cookies. That's what i had for you today, as I was a coffee lover myself, today's recipe involves nothing more than just 'coffee'. I like to enjoy a cup of coffee whenever I can squeeze sometime in my busy days..........sometimes just 15 – 20 minutes out of those heavy hectic schedules. I would always make a cup of 3-1 Old Town Original Coffee and dip some cookies or biscuits of my choice.........sometimes just plain Cream Crackers will do too.....LOL

Since there are a lot of coffee lovers out there, and not to mention, I have two of my own kids, Ian and Angel are a big fan of coffee (hmm, makes me wonder where did they get this inheritance from...??).......My MIL would say that they got this all from me......I wouldn't doubt it too.....hehehe. In fact today's recipe was picked out by Ian when he was browsing through this newly bough cookbook of mine – "Biscuit Code by Florence Tan". He chose "Coffee Flower" after flipping back and forth a few times. He told me, "Mummy, I think these cookies would be yummy, and I just love the taste of coffee"....and well, I have to agree too, as it looks really good. So, I get him to involve in the piping of the rosettes on the baking tray, and we had such fun and good times laughing at some of the awkward shapes being piped out. Well, coffee lovers out there......give it a try. Happy baking!


Ingredients

(A)

220gm flour (sifted)
45gm corn flour (sifted)

(B)

150gm castor sugar
150gm butter
½ tsp ovalette
1 egg
1 ½ tsp coffee oil
1 tbsp instant coffee
1 tbsp hot water (mix with instant coffee)

Method:
  1. Cream ingredients (B) until fluffy. Pour in coffee last.
  2. Fold in ingredients (A) and stir well.
  3. Put the dough in the star-shaped nozzle. Pipe any design you desire. Decorate with almond flakes.
  4. Put on a greased baking tray and bake in oven at 180~C for 15 to 20 minutes.

Tuesday, September 15, 2009

Chocolate Cupcakes

September 14, 2009 - Haha, sounds a bit funny right to hear that I have a birthday project in hand......I was a bit skeptical at first , but decided to give it a try. Angel was asking for a 'princess' birthday cake for her birthday since she saw this 'princess birthday cake' being sold at one of the cake corner at City Mall. Gosh, the cake is so expensive......it's a normal marble cake with a doll decoration, and is selling at RM98 - RM110. I was really not a cake person, so buying a cake with that amount of money, I would felt that it's not worth it at all...........I would rather use that RM110 to get her something that she likes.
So, that's when I decided to outbid that challenge., to make a birthday cake with doll on it..........hehe. So I submitted my leave approval to apply for a day off on the 14th Sept, a day before Angel's birthday. Having a listing of what I'm going to do, to buy and to prepare.....geez, this is going to be fun, I guessed :P
I went to do little shopping, bought the ingredients I need to make the 40 chocolate cupcakes, and also a butter cake and also some tidbits and snacks for the children party pack. So, the day came I was pretty excited myself. I sent Angel to school in the morning and didn't tell her a word about my project, but did leak a few words to my boys that I will be on-leave to day to get ready something for their little sister's birthday.
I started at 9am with the rolled fondant ( that I made 2 days ago). Firstly, I moulded the body, then the head, and the hands for the 'Hello Kitty' figurines (it doesn't look like HK to me though), and the tiny 40 pieces of each are done.

Next, I made the 'Chocolate Cupcakes'  where I got the recipe from the 'Cupcake Design' by Bake With Yen (KL) Sdn Bhd book that I bought from Bake With Me cake ingredients shop in Lintas Plaza. The cupcakes turned out really nice, and chocolaty too, and I presumed the kids will just love it. While waiting for the cupcakes to cool, I quickly get the batter for the 'Butter Cake' ready, and set it to bake. This will be for Angel's "Little Mermaid" birthday cake.
Here's the recipes for the Chocolate Cupcakes and the Butter Cake, it's really easy to make, even for a starter like me, hehe.


Chocolate Cupcake
Ingredients
(A)
240gm butter
350gm fine granulated sugar (I use only 150gm castor sugar)
150gm eggs
1 tsp vanilla esssence

(B)
170gm cake flour ) (I used self raising flour and omitted the baking powder)
75gm cocoa powder)
1 1/2 tsp baking powder) sift these 3 items together

(C)
150ml milk

Method
  1. Beat the butter and sugar until light and fluffy.
  2. One at a time beat in the eggs, then beat in the vanilla essence.
  3. Alternatively ass in the sifted flour mixture and the milk, starting and finishing with the flour mixture.
  4. Scoop batter in the baking cups until 2/3 full.
  5. Bake at 180~C for 20-25 minutes.

Butter Cake
Ingredients
180 - 200gm Self raising flour
80gm Castor sugar
250gm butter
5 large eggs

Method:
  1. Pre-heat oven to 180~C.
  2. Sift the flour. In another bowl, beat the eggs to mix well.
  3. Beat the butter and sugar in a mixing bowl and slowly add in the egg. Beat until the mixture turned pale in colour.
  4. Then slowly add in the flour and continue mixing until the mixture is smooth and creamy.
  5. Pour into a cake tin and bake for 30-45 minutes until until the skewer comes out clean.

Thursday, September 10, 2009

Sweet Bun Dough

If you ask me to choose between bread and rice, I would always got for bread :p
My mum used to say I'm the 'kwai lou' type of people who can survive only on bread and without rice. I think even my kids got that from me too except for ANGEL, she likes to eat plain rice with hot soup. My boys would chose bread and pasta over rice anytime when my Mum-in-law (MIL) asked for opinion on what to cook for the day.
My MIL used to tell me, "You better learn to make bread or buns since your kids just loves them so much'. she also said that" it's not that hard actually, just master the kneading and one type of dough, and that's all you need". At first I don't really get what she meant, as I was wondering to myself, how can just one type of dough will cover the whole list of all the types of buns my kids like....??? Then, I decided to do a little research, and search the internet to see what are the types of dough normally used to make those 'list of buns' that my kids would love.......and the answer is "Sweet Bun Dough" is all you need to know.....and you can transform that into any type of toppings or fillings you wished, even any shapes and sizes you want too ^-^
I though that would be really interesting. Then the other day,my MIL made some 'Sausage Buns' for the kids, and I was so tempted to try and make some too. I googled and googled and found a number of 'Basic Sweet Bun Dough" recipes from a few bloggers. I printed it all down , made some comparisons and decided to try the ones that is the simplest.

My kids are also a big fan of bread and buns. The eldest would love anything with Tuna Mayo in it, the Twins will go for Curry Tuna and Angel just love plain white sandwich
bread or Sausage buns. Therefore, because I have so many breadlovers in the house, I'm definitely going to give it a try. So, after gathering all my ingredients, here is my first buns making attempt :P  The 'Basic Sweet Bun Dough' recipe that I have chosen is from CookingMomster. Thanks to her, as this first attempt did not failed me , but indeed gave me such big encouragement and I'm going to bake more of buns and bread in the future......Yippee!!! Thanks to you, 'CookingMomster' for sharing this awesome recipe!!


BASIC SWEET BUN DOUGH

Ingredients :                            For glazing:
330gm        high protein flour      1 egg, beaten
1/2 tsp       salt
1 1/2 tbsp   milk powder
60gm          castor sugar             For filling:
1 tsp           bread improver       Chicken sausages / frankfurters (I made my fillings with Curry Tuna ,Grated Cheddar Cheese)                                                  
1   
          egg
120ml      water
10gm       instant yeast
40gm       butter

Method:
1. Mixed water and instant yeast together and set aside.
2. Combine high protein flour, bread improver, salt, milk powder and castor sugar into a mixing bowl. Using a 'S' hook, mix all the ingredient together for about a minute then add in the yeast mixture with water and egg. Mixed again to form a dough and then add in the butter and give it another mix for about 10 minutes.
3. Remove the dough and knead the dough with hand for about 30 minutes or until the dough has a smooth surface. Check the dough whether it is fully developed by stretching a small piece of dough with your fingers. When the dough can be stretch into a thin layer without tearing, then it is ready.
4. Remove dough and cover the dough with a damp cloth. Leave bowl in a warm place and let it proof for about 40 minutes till it double its size.
5. Divide dough into 50gm portions. Flatten and roll out each portion into a longish shape.
6. Place sausages in the centre, roll up and seal. Arrange on a greased baking tray, well spaced apart. Cover and rest for the next 40 minutes until the buns double its size again.
7. Glaze with beaten egg wash and bake the buns in a preheated oven at 180`C for 15 - 20 minutes.
Give it a try, it's fun and you'll find that it's a lot of satisfaction when you saw the end result ......:) Happy 'Buns' baking!

Wednesday, September 9, 2009

Pushing the "Start" button....finally


Hi all.....I have always think that blogging is like some kind of commitment , that once you decided to start, it'll be ongoing.......forever. I love reading people's blogs, especially those that really stir-up my interest like ......baking, for instance. Some of the bloggers that I have been following are really very good in this........their photos are great looking, very professionally taken, their experience in baking and cooking, their blogs lay-out are well edited and very impressive looking, and most of all, I just love and salute their commitment in updating their blogs so very often in a week........sometimes you just get a notification that they have updated their blogs, when the last time you have seen it was only yesterday.....;)  
Then, I also think that only a writer will write a good blog, whom I am definitely not....hahaha....but don't be surprise, you'll find a lot of other people who really just love to blog about anything....and I think that's pretty annoying in a way........and also encouraging too.....depends on how you look at it, hehe ^_^
Well, for me, I will blog about my trials and attempts in baking (and maybe some cooking too) that I have just started to fall in love with. I'll use this blog of mine to jot down the number of recipes I have tried, the number of meltdowns (or failure) that I have encountered before finally finding victory in it, the little experiences that I have gained and maybe even tips that I have gathered. So, this blog is more of a 'MY DIARY" kind of thing and not so much of showing off my work of art or experiences, which I think I really still have a long way to go, to reach that level :P
Like anyone, I love to eat, and that is it.........don't ever ask me to cook up something, or else you will end up in calling in for a delivery.....LOL       But that is really funny as I have a Chef husband , who just loves to cook, and that is his profession. Maybe because he is such a good husband, he doesn't force me to learn to cook all these years.....and I have never cook a dish in my life.....unless you called "Maggi with egg and ham" is a dish, LOL.......
Anyway, I'll start by introducing my family to you first, so that in the future, when I mentioned their names, you guys would know who I'm referring to :)
The "Head Chef" of the house is my Hubby, CLARENCE; the "Trendy Boy" is my eldest son, IAN; the "Great Foodtaster" is my elder twin, DANIEL; the "Smarty" is my younger twin, DYLAN and lastly the "Little Princess" of the house, that is my youngest daugther, ANGELICA. OK, so much for an intro, I will start my blogging as soon as I lay my hands on the first recipe I set my eyes on........by the way, please feel free to leave your comment....as I will really appreciate it. Till then, see you guys soon......hope you will enjoy reading my journey......cheers and thanks for dropping by!