Wednesday, June 2, 2010

MAYO, HAM AND CHEESE BUNS


Another posting on bread and buns……gosh! Am I glad that there's this long holiday going on in May……I can almost bake bread and buns everyday :P My family has almost all the members a big fan of bread and buns, so making it will not have me worry that it will be kept for days and then ended up in the bin. This time I let the kids decide what they want the filling to inside the buns…….and they requested , "mayonnaise with ham with mozzarella cheese and some extra cheese for topping……….wah! so fulfilling oh…..OK! here you go kids…all for you guys this time!!
Well, you can too come up with your own favourite fillings. The 'Sweet Bun Dough / Straight Dough is also taken from "Alex Goh's The World of Bread" cookbook and you can refer here for the recipe….. …..Happy buns baking again ;)

 MAYO, HAM AND CHEESE BUNS
For the Filling
6 pieces of Tulip Cooked Ham / Chicken Ham / Turkey Ham, cut into small squares
3 Tbsp of Mayonnaise
A dash of salt and pepper to taste
Some grated Mozzarella Cheese
Some grated Cheddar Cheese for topping
1 Egg for egg wash


Filling Preparation:
  1. Mix the cut ham and mayonnaise together in a clean bowl.
  2. Add in the grated Mozzarella cheese and mix well. Put in the salt and pepper to taste. Set aside until ready to use.
Method for Bread:
  1. Mix (A) till well blended.
  2. Add (B) and knead to form a dough. (Remember to add the water bit by bit until you can get the dough to not stick to your hands, and not too soft. Sometimes you might find that you don't need to use all the water, because different flour brand, has different water absorption level).
  3. Add (C), continue to knead to form a smooth and elastic dough.
  4. Cover the dough with clear film or a damp kitchen towel. Let it prove for 50-60 minutes, or until it double its size.
  5. Use your finger, dip into flour and press into the centre of the dough. It should show a clear finger dip mark, but the dough should not sink. The finger mark should stay there too.
  6. Divide the dough into 60gm portions, mould them into balls and let them rest for 10 minutes.
  7. Flatten the dough balls lightly using the palm of your hand on a flat work surface to release out all the air bubbles, and mould it into a round shape.
  8. Fill in the Mayo, Ham and Cheese filling, about 1 tsp in the centre, and using your fingers to seal the opening .
  9. Put them on the baking tray, lightly greased, and let it prove for about 30 – 40 minutes, or until double in size again.
  10. Eggwash the top of the buns, and sprinkle some grated Cheddar Cheese on top.
  11. Bake at preheat oven at 190~C in the middle of the oven for 12-15 minutes. Serve.

Tuesday, June 1, 2010

CHEESE STRIPS BREAD


First of all, I would like to wish all the Kadazan-Dusun friends of mine a very "Happy Harvest Festival" or "Kotobian Tadau Kaamatan"………and that means it's public holiday for us and this year, it falls on a Sunday and Monday (30th and 31st of May) and we get an extra day in replacement of the Sunday. Wow, we haven't had this for quite some time already……..those who have planned well ahead, would have gone overseas for a vacation. As for me and my family, we had no special plans but just staying back at home to rest have some quality family time. Me? I baked almost everyday starting from the 29th since it was a Saturday……:P This blog is going to talk about what I baked on the 30th and that is "Cheese Sticks" ( I called it Cheese Strips instead). This is one of my little girl's favourite bread and she will not miss buying it each time she sees it. So, this is for you, Angelica sweetie J
I just love to bake bread and buns, I think I have said this many times and you might have this phrase sunk deep inside your head already…..but sorry to repeat it again……, hehe ^_^ but I still do……especially when I have the whole day to do it. This time I have chosen to use 'Alex Goh's - The World of Bread' cookbook from my mini library to make the 'Sweet Bun Dough' or what he called 'Straight Dough'.


Sweet Bun Dough / Straight Dough
(A)
480gm Bread flour
120gm Plain flour
110gm Castor sugar
10gm Salt
20gm Milk powder
4 tsp Instant Yeast
(B)
1 Egg
300ml Cold water
(C)
60gm Butter, softened

 
*Grated Cheddar Cheese
*Sugar

 
Method for Bread:
  1. Mix (A) till well blended.
  2. Add (B) and knead to form a dough. (Remember to add the water bit by bit until you can get the dough to not stick to your hands, and not too soft. Sometimes you might find that you don't need to use all the water, because different flour brand, has different water absorption level).
  3. Add (C), continue to knead to form a smooth and elastic dough.
  4. Cover the dough with clear film or a damp kitchen towel. Let it prove for 50-60 minutes, or until it double its size.
  5. Use your finger, dip into flour and press into the centre of the dough. It should show a clear finger dip mark, but the dough should not sink. The finger mark should stay there too.
  6. Divide the dough into 60gm portions and mould them into balls. Leave them to rest for 10 minutes.
  7. Flatten the dough balls lightly using the palm of your hand on a flat work surface to release out all the air bubbles, and roll them out into 30cm long strips.
  8. Place them in a greased baking tray and put in a warm place to prove for 45 minutes.
  9. Brush with egg wash and sprinkle with some grated Cheddar Cheese, then with sugar on top.
  10. Bake in a preheated oven at 190~C for 12 minutes, or until golden brown, in the middle rack of the oven. Ready to serve. 

Happy Buns Baking………^_^

Monday, May 31, 2010

Learn2Bake May Challenge Part 2 – Pandan Chiffon Cake, My Healthy Piece of Cake


I'm so happy that Learn2Bake Club has sailed through its 2nd month with more new members joining the club and more members participating in the challenge. I think the objective of the club has finally has it's result…..and that it to have members participate in the baking challenge and learn something out it. Some people asked me if the challenge has any prizes or awards, well…….NO….but the fun of having other people baking with you and then sharing it over with their pictures and comments is already good enough. Of course, if I can make this club better , I would organize members who lives in the same city or town to have a get-together once every 2 months to meet and share ideas in person……and have a little 'baking potluck' at someone 's house ^-^……well, that is something that I have listed down to impose later to the club, and that is if members agree to it.
As of now……I'm very happy with the current outcome and ongoing activities as we are still very new and this is only the 2nd month…..entering to the 3rd month that is. So, the May Part 2 Challenge was to bake a Pandan Chiffon Cake….and I have chosen the recipe from Cooking Crave's blog. I have tried this recipe a few times already and was pretty satisfied with it. The outcome of the cake was very fluffy, light and the Pandan aroma was just great! It does not requires any frosting as this cake is best eaten plain as frosting is suppose to add calories to the cake with the amount of sugar used……..Chiffon Cake is a healthy piece of cake I would agree, as it does not uses any butter but instead …..liquid fat only such as Canola Oil. Anyway, for myself this time, I opted a different recipe for my Pandan Chiffon Cake as I wanted to try a different recipe that I got it from 'Table for 2' as she has a very unique recipe for this cake without using any 'liquid fat' ….that is why I wanted to give it a try ^-^ Well, like Wendy said in her blog……it's oil-less, not oil-free……as the coconut milk used in the recipe still contains a minimal amount of oil in it.


Here is a recipe you might want to try and it's a keeper for me as I find that the outcome of the cake…….is just as good as the one with liquid fat in it……well, since I categorized Chiffon Cake as a healthy cake, I would definitely try to have it the least oil-less as possible, LOL…….thanks for sharing the recipe on your blog, Wendy…credits all goes to you!


OIL-LESS PANDAN CHIFFON CAKE
Ingredients:

Batter A
5 egg whites
¼ tsp cream of tartar
100gm sugar
Batter B
5 egg yolks
100gm sugar
150gm flour
180gm thick coconut milk + pinch of salt
70gm concentrated pandan juice


Method:
1. Preheat oven to 180~Celsius. Put your rack in the centre of the oven.
2. Mix in the coconut milk and pandan juice in a bowl. Then add in the sifted flour into it until a smooth batter is formed. Set aside.
3. Beat egg whites until frothy, add in cream of tartar, whisk until egg whites are at medium peaks.
4. Add in 100gm sugar gradually and beat until stiff peaks.
5. In another bowl, beat egg yolks and 100gm sugar until thick and pale (colour of cold butter).
6. Fold egg yolks into batter.
7. Fold ¼ of egg whites into (5), and another ¼.
8. Pour (6) into remaining egg whites and fold in well.
9. Pour into a 25cm tube pan and bake for 45 minutes.(I don't have 25cm tube pan, therefore I used a 22cm and the cake rose pretty high, luckily it did not sink)

10. When the cake is done, immediately remove from oven and invert it to cool.
11. When cake has totally cooled down, remove from pan.


Happy Pandan Chiffon Cake baking....;)

Thursday, May 27, 2010

Happy Teachers’ Day – Chocolate Cupcakes with Chocolate Buttercream


"Happy Teachers' Day" to all the teachers in the world........it's your day and we, as parents, could not find enough words to thank you for all that you have given and done to our children. Without you all, our children will not be what they are today. .....and for the children, I'm sure they would appreciate so much of what you as a teacher have given to them - the patience, the guidance, the knowledge and the teachings that have been showering upon them from Day 1 they enter the school till the day they graduate. 
My boys (all 3 of them) have been getting ready what to give to their teachers as a gift of 'Thank you" and selecting cards since a week ago. As their school is having a 'Happy Teachers' Day' party (on the 27th) , all students are requested to bring a dish to contribute to the feast. This year, the twins (Daniel & Dylan) has requested me to bake 40 pieces of cupcakes and for Ian, he requested for his grandma to cook 'Curry Chicken' ^_^ . I have selected the 'Old-Fashioned Chocolate Cupcakes' and the frosting a 'Chocolate Buttercream' would goes really well with it........as I think Chocolate would be the favourite among many, hehe :P
I baked it on the 26th and made the buttercream too on the same day. After cooling down all the cupcakes, I lightly frosted them with a simple 'star-tip' swirl and sprinkled some hundreds and thousands. I also made some gum paste lettering to be put on some of the cupcakes that read - "HAPPY TEACHERS' DAY". All packed and ready to be delivered to the school the next morning, I kept them in the fridge and hurry up to bed.....only to realize that I'm the only one in the kitchen, whereas all of them are in bed ....it's 12.40am.....*yawn*....good night everyone.....my mission accomplished!! I got the recipes from here (for the cupcake) and here (for the buttercream)...........Happy Cupcakes baking dudes ;)
p/s: By the way I doubled the recipe for the cupcakes and got about 42 cupcakes (standard size) and I also doubled the buttercream to frost all the 42 cupcakes. 


OLD-FASHIONED CHOCOLATE CUPCAKES

Ingredients (Made 14-16 cupcakes)
115gm unsalted butter, room temperature
100gm castor sugar
2 large eggs, room temperature
95gm plain flour
½ teaspoon baking powder
¼ teaspoon baking soda
¼ teaspoon salt
60gm unsweetened cocoa powder
½ cup milk
1 teaspoons vanilla essence


Method 
1. Preheat oven to 190~C. ( I had mine at 180~C)
2. Beat butter until softened. Add sugar and beat until light and fluffy, about 3 minutes.
3. Slowly add in the eggs, one at a time and beating it until well combined.
4. Sift the flour, baking powder, baking soda, salt, and cocoa powder into a small sized bowl and whisk to combine.
5. Measure out the milk and vanilla essence and stir to combine.
6. Add about 1/3 of the dry ingredients to the butter/sugar mixture and beat to combine. Add about half of the milk/vanilla mixture and beat to combine. Continue adding, alternating between dry and wet and finishing with the dry.
7. Scoop the batter into cupcake cups filling about 2/3 full. Don't be tempted to fill more to get a dome, as this recipe tends to result in a flat surface cupcake. Bake cupcakes at 180~C for about 20-25 minutes or until a cake tester comes out clean. 


CHOCOLATE BUTTERCREAM
(enough to lightly frost 24 cupcakes) 

Ingredients 
115gm butter
60gm cocoa powder
500gm icing/confectioner's sugar

¼ cup milk 

Method  
1. Beat the butter on high speed for about 30 seconds until soft.
2. Add the cocoa powder and a cup of sugar and beat until incorporated.
3. Add half of the milk and the remainder of sugar and beat until well incorporated.
4. Continue to add milk bit by bit until you get to the consistency you want. (I used up ¼ cup and the texture was just nice)


Thursday, May 20, 2010

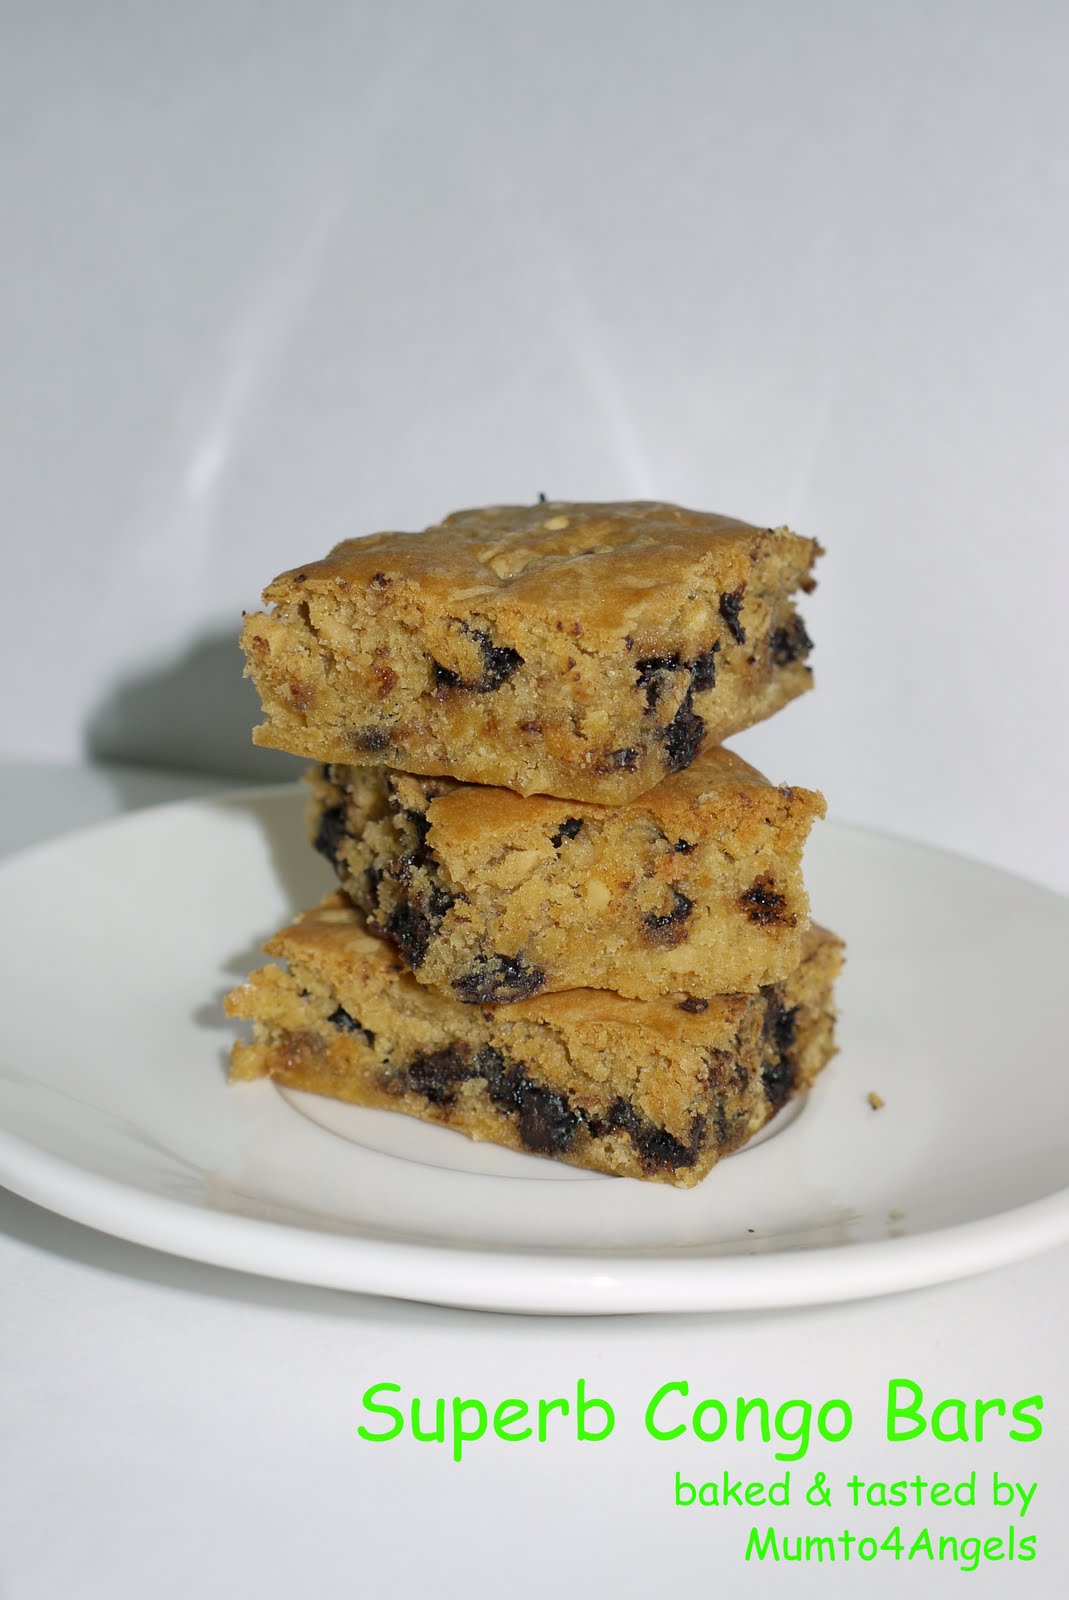
Superb Congo Bars


I'm very excited today as I am leaving on a jet-plane to Singapore early tomorrow morning……..yeah…..will be meeting with a good friend that I have been missing for a year now. She (Joanne) has moved to Johor to work a year ago and I have promised her that I will visit her one day ……….for sure before she comes back to KK again. Since the timing is right, this is the time as she will be moving back to KK early July. Therefore, I will be away from the 21st – 23rd June and most likely will not be posting anything these few days. I am now planning to bake something for JO as she requested something from my oven….LOL ^-^ I have checked with her if she is a fan of 'chocolate' and she said 'YES'…..so looks like I'm going to bake something from chocolate and I'm definitely going to make it very rich and chocolaty.

 I have bumped into this recipe called 'Congo Bars' just few days ago and I find it very much like a 'brownie' but a little different in the texture and also this uses 100% brown sugar instead of castor sugar. So I'm going to give this recipe a try and see how yummy it is……..since I'm also a big fan of Chocolate and also anything that taste like Brownie…….:P
This is where I got this recipe. I find that the texture is so much like a brownie after I took a bite, but the color is a lot lighter than normal brownies would have…….as this one uses 100% brown sugar, it has a lighter shade of brown, but the amount of chocolate chips dumped into it, sure produces a very chocolaty and rich Congo Bars……hehe. The only alterations I did in this recipe is I cut down quite a lot on the amount of sugar used……..from 453gm (1lb) to 300gm only…..and yet I still find it sweet though……...so do cut more down if you wish.
I wouldn't be typing down the recipe again as it would be better if you go straight to this website and take it down……..because there are some awesome pictures and ideas in making this Congo Bars in other varieties besides using chocolate chips…….so, check it out……and you might like to try out those other suggestions…..once again, Happy 'Congo Bars' baking………see you after the 23rd June……..cheers!!


  Happy Congo Bars Baking, dudes!!